
Folding Outside the Straight Line
As a child, I strove to make the perfect dart airplane. It was easy to fold, and flew fast and far. Later, I conquered floating boats, newspaper party hats, and that schoolyard favorite, the fortuneteller.
From airplanes to fortunetellers, the first step was always the same: Fold the paper in half, making sure the corners line up, to create a neat crease. The more perfect the first fold — the straighter the line — the greater probability of project success.
So, when Professor Emeritus Stephen F. Jacobs suggested I write an article about his adventures in folding along a curve, I hesitated. Although seeing is believing, and I had seen Steve’s impressive paper sculpture displayed on the eighth floor of Meinel Building, I still had trouble wrapping my mind around the concept.
Steve confessed to me that he had felt the same way 10 years ago when Robert G. Greenler, professor emeritus at the University of Wisconsin, Milwaukee, and past president of the Optical Society (OSA), challenged him to fold a sheet of paper without folding along a straight line. (Bob, a former classmate of Steve’s at Johns Hopkins University, is best known for his popular science education production “The Science Bag.” He had always shared Steve’s passion for making science fun for everyone, and he was eager to share his newest trick with his old friend.)
In theory, making a three-dimensional object from a rectangular pattern by folding along the curve sounds as easy as Steve describes it. “You simply pinch the paper with your fingers along the curves then stabilize your created sculpture with transparent tape.”
After Bob’s challenge, Steve spent an enjoyable month or so experimenting. He achieved some display-worthy results, especially by folding along a sine curve. At last, he was ready to share his “discovery” with others — Steve gave a lecture at City High School, a small charter school in downtown Tucson, where he, along with the students, created many small paper sculptures.
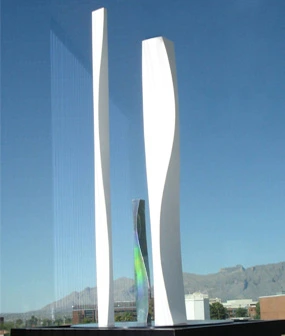
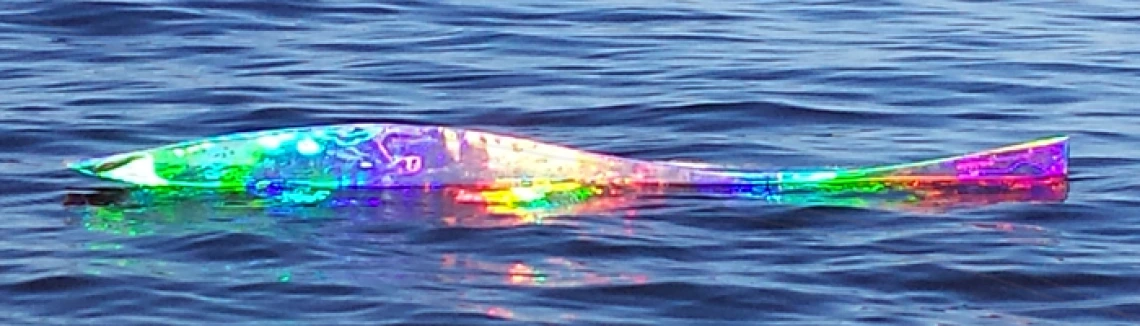
Next, Steve was ready to go big — creating the four-foot sculpture that is still displayed on the eighth floor at OSC, as well as an eight-foot model originally placed in the courtyard of Tucson’s Pima Council on Aging and now in the permanent collection of the Sculpture Garden at the Tucson Jewish Community Center. With those accomplishments behind him, what more could he do with the art of sine wave sculpture except attach a head and a tail to a colorful piece made from a thin sheet of diffractive mylar and release it into the Sea of Cortez in San Carlos, Mexico?
After seeing a photo of Steve’s sine wave fish, I knew I had to conquer my fear of folding outside the straight line and finally write his story. So, I called Steve and asked him if he would give me a quick demonstration. After he readily agreed, we arranged a time to meet at his house.
I arrived that morning, camera in hand, fully expecting to watch Steve create a few small sculptures that I would photograph. What I got was a hands-on assignment from professor Jacobs.
Steve: Follow me to my office. I have everything set up for you over there on the table. Just jump in and start folding along the curves of the sine wave printed on the gray piece of paper.
Tammy: (After a few long seconds of self doubt, but not wanting to admit failure or disappoint Steve.) Would you mind showing me how to start?
Steve picked up the sheet of paper and began effortlessly pinching the paper with his fingers along the curves. After a few inches, he handed the project back to me. This time I jumped in and my own sine wave sculpture, now proudly displayed at home, began to take shape. In spite of my initial skepticism, I learned that even I could fold paper along a smooth curve.